A WordPress plugin is a piece of software that extends the functionality of a WordPress website. It allows users to add new features, modify existing functionality, or enhance various aspects of their WordPress site without altering the core
codebase.WordPress plugins are typically developed by third-party developers and can be freely available from the official WordPress Plugin Directory or sold through third-party marketplaces. Users can install and activate plugins from within the WordPress admin dashboard, and most plugins offer configuration options that can be accessed through the WordPress settings menu. Overall, plugins play a crucial role in extending the functionality and versatility of WordPress websites, allowing users to tailor their sites to meet their specific needs and goals.
Method-1 (WordPress Plugin Search)
Log in to your WordPress Admin Dashboard: Visit your WordPress website and log in with your username and password. The login page is usually located at http://yourdomain.com/wp-admin.Once logged in, you’ll be in the WordPress admin area. From the admin menu on the left-hand side, hover over “Plugins”, then click on “Add New”. This will take you to the plugin installation page. On the “Add Plugins” page, you’ll see a search box on the right side. Enter the name or a relevant keyword related to the plugin you want to install. For example, if you want to install a plugin called “spam”, you can search for “Akismet Anti-spam: Spam Protection “.

Browse the Search Results: WordPress will display a list of search results based on your query. Browse through the list and find the plugin you want to install. You can click on the “More Details” link to view more information about a plugin, including its description, ratings, reviews, and screenshots.
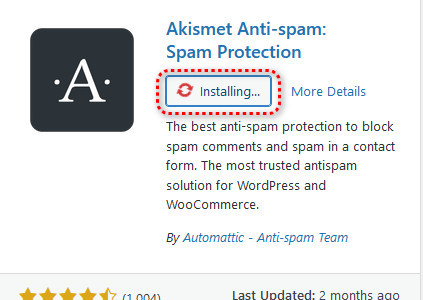
Install the Plugin: Once you’ve found the plugin you want to install, click on the “Install Now” button next to it. WordPress will download and install the plugin automatically. You’ll see a progress indicator while the plugin is being installed.
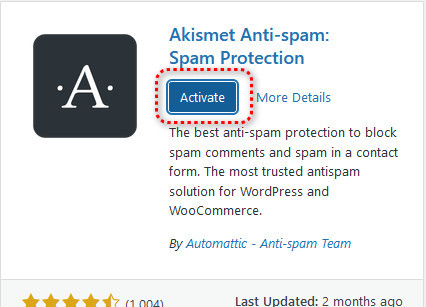
Activate the Plugin: After the plugin has been successfully installed, the “Install Now” button will change to an “Activate” button. Click on the “Activate” button to activate the plugin on your WordPress site.
Done!: Once the plugin has been installed and activated, you can start using its features on your WordPress website.
That’s it! You’ve successfully installed a plugin using the WordPress Plugin Search. You can now explore the plugin’s functionality and customize it to suit your needs.
Method-2 (Plugin Upload)
Certainly! Here’s a step-by-step guide on how to install a plugin using the WordPress admin plugin upload feature:

Download the Plugin: First, you need to download the plugin’s ZIP file to your computer. You can download plugins from various sources, such as the official WordPress Plugin Directory or third-party websites.

Visit your WordPress website and log in with your username and password. The login page is typically located at http://yourdomain.com/wp-admin.Once logged in, you’ll be in the WordPress admin area. From the admin menu on the left-hand side, hover over “Plugins”, then click on “Add New”. This will take you to the plugin installation page.
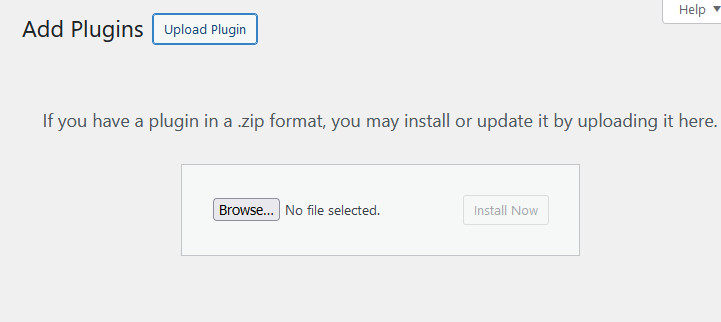
Upload the Plugin: On the “Add Plugins” page, you’ll see a button at the top labeled “Upload Plugin”. Click on this button to proceed to the plugin upload form.

Choose the Plugin ZIP File: Click on the “Choose File” button, then navigate to the location on your computer where you downloaded the plugin ZIP file. Select the ZIP file and click “Open” to upload it.
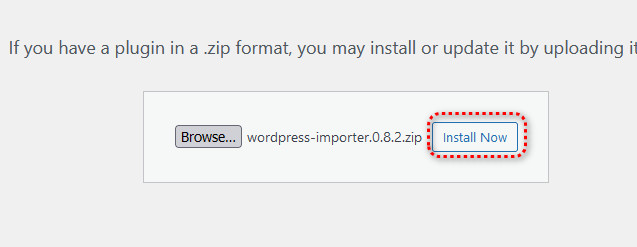
Install the Plugin: After selecting the plugin ZIP file, click on the “Install Now” button to upload and install the plugin. WordPress will upload the plugin file from your computer and install it on your website.

Activate the Plugin: Once the plugin has been successfully installed, you’ll see a message indicating that the installation was successful. To activate the plugin, click on the “Activate Plugin” link.
Done!: Congratulations, you have successfully installed a plugin using the WordPress admin plugin upload feature. You can now start using the plugin’s features on your WordPress website.
That’s it! You’ve successfully installed a plugin using the WordPress admin plugin upload feature. You can now explore the plugin’s functionality and customize it to suit your needs.
Method – 3 (using FTP)
Installing a WordPress plugin using FTP (File Transfer Protocol) involves manually uploading plugin files to your server. Here’s a step-by-step guide:
Download the Plugin: Start by downloading the plugin ZIP file from a trusted source. This is typically from the WordPress Plugin Directory or from the plugin’s official website.

Extract the Plugin: Once downloaded, extract the contents of the ZIP file to your computer. You’ll typically find a folder containing the plugin files.
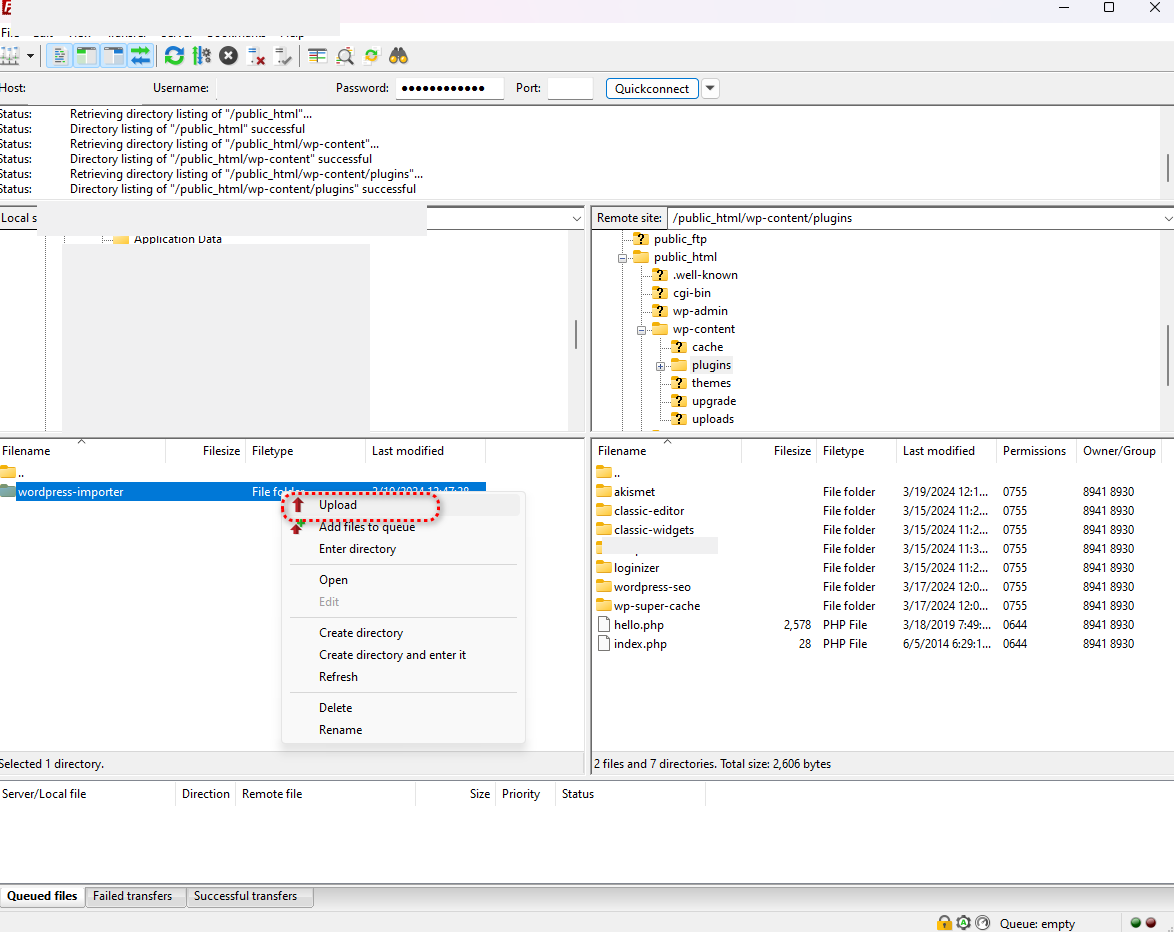
- Connect to Your Server via FTP: Use an FTP client like FileZilla or Cyberduck to connect to your WordPress site’s server. You’ll need your FTP credentials (hostname, username, password) provided by your web hosting provider.
- Navigate to the WordPress Plugins Directory: In your FTP client, navigate to the
wp-content/pluginsdirectory within your WordPress installation. This is where all WordPress plugins are stored. - Upload the Plugin Files: From your computer, locate the folder containing the plugin files that you extracted earlier. Upload this entire folder to the
wp-content/pluginsdirectory on your server.

Activate the Plugin: Once the plugin files are uploaded, log in to your WordPress Admin Dashboard. Go to the “Plugins” page, where you should now see the newly uploaded plugin listed. Click on the “Activate” link below the plugin’s name to activate it.
Done!: Congratulations, you have successfully installed a WordPress plugin using FTP. You can now start using the plugin’s features on your WordPress website.
It’s important to note that while installing plugins via FTP is a manual process, it can be useful in situations where the WordPress admin dashboard is inaccessible or when you prefer to handle file uploads directly. Always make sure to download plugins from reputable sources to ensure their security and reliability