CDN:
A Content Delivery Network (CDN) is a network of distributed servers strategically located around the world to deliver web content more efficiently to users based on their geographical location. The primary purpose of a CDN is to reduce latency and improve website performance by caching content closer to the user.
How CDN Work:
When a user requests content from a website (such as images, CSS files, JavaScript files, videos, or other static assets), the request is routed to the nearest CDN server instead of the origin server where the website is hosted.The CDN server selected to respond to the user’s request is typically determined based on factors such as the user’s geographical location, network proximity, server load, and availability.If the requested content is already cached on the CDN server, it is served directly to the user from the server’s cache, reducing the need to retrieve the content from the origin server. This helps to reduce latency and improve page load times.
How to setup CDN:
Select a CDN Provider: Choose a CDN provider that suits your requirements and budget. Popular CDN providers include Cloudflare, StackPath, KeyCDN, Amazon CloudFront, and Bunny CD
Create the Pull Zone: Sign up for an account with your chosen CDN provider and configure it according to your needs Once you’re satisfied. Then Create the pull zone. The CDN provider will then set up the pull zone and provide you with a CDN URL like: wpkik-cdn.b-cdn.net
Example:
Origin URL :
https://wpkik.com//wpkik-cdn.b-cdn.net/wp-content/uploads/2024/03/Bunnycdn.png
CDN URL:
https://wpkik-cdn.b-cdn.net//wpkik-cdn.b-cdn.net/wp-content/uploads/2024/03/Bunnycdn.png
Setup in WordPress:
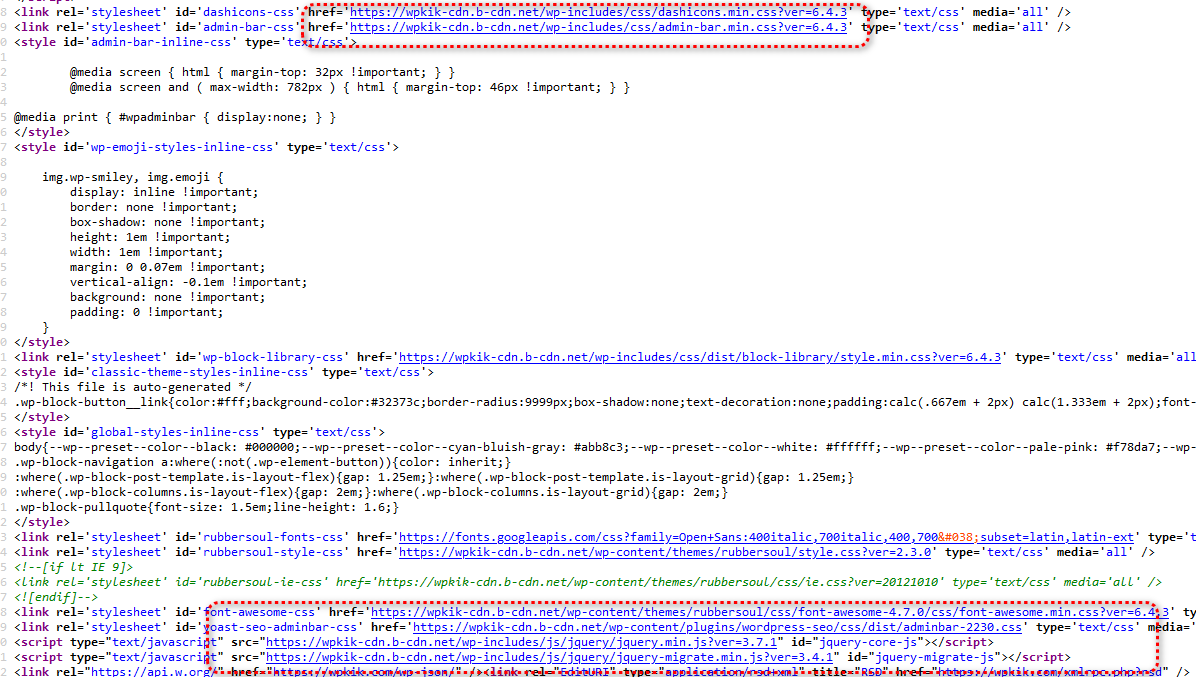
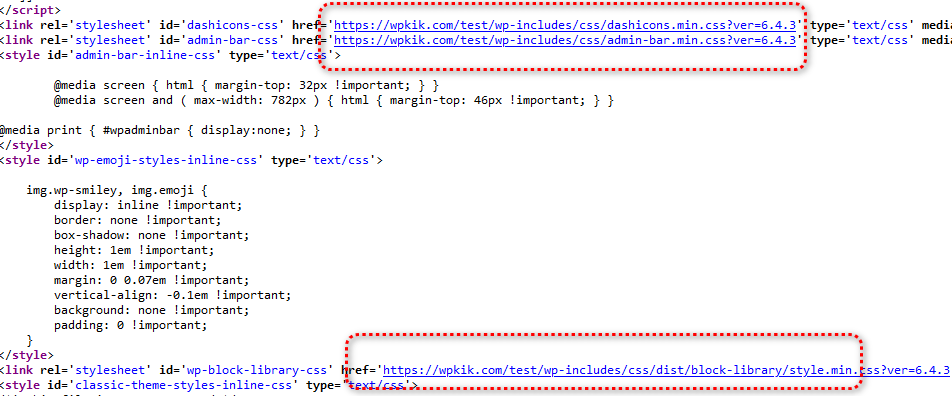
View-source Your site and check all CSS,js files URL see all Your URL own domain.Need to change all URLs.
Method-1 (With plugin)
WP Super Cache Plugin:

- Once activated, go to “Settings” > “WP Super Cache”.
- Go to the “CDN” tab in the WP Super Cache settings.
- Check the box next to “Enable CDN Support”.
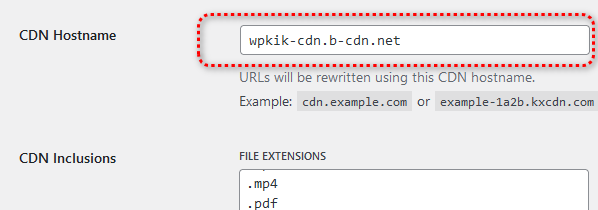
- Enter your CDN hostname provided by your CDN provider (e.g., cdn.example.com) in the “Off-site URL” field.
- Save the settings.
CDN Enabler: To configure CDN (Content Delivery Network) using the WordPress plugin CDN Enabler, you can follow these steps:
- Once activated, go to “Settings” > “CDN Enabler”.
- Enter the CDN URL in the “CDN URL” field.
- Optionally, you can specify file types to be rewritten to use the CDN URL. By default, common file types like images, CSS, and JavaScript files are included.
- Save the settings.
Method-2 (without plugin)
By htaccess: Before making any changes, create a backup of your .htaccess file. This ensures that you can revert to the original file if anything goes wrong.
- Open the
.htaccessfile in a text editor. - Add mod_rewrite rules to rewrite requests to your CDN. For example:
RewriteEngine On
RewriteCond %{REQUEST_URI} \.(jpg|jpeg|png|gif|css|js)$ [NC]
RewriteRule ^(.*)$ http://cdn.example.com/$1 [R=301,L]
Replace http://cdn.example.com/ with the URL of your CDN and adjust the file types in the RewriteCond pattern as needed.Save the changes to the .htaccess file.
nginx Config: To rewrite CDN URLs using Nginx, you can use the location directive along with proxy_pass to redirect requests to your CDN. Here’s a general guide on how to do it:Before making any changes, create a backup of your Nginx configuration file. This ensures that you can revert to the original file if anything goes wrong.
The Nginx configuration file is typically located in /etc/nginx/nginx.conf or within the sites-available directory (e.g., /etc/nginx/sites-available/default).
location ~* \.(jpg|jpeg|png|gif|css|js)$ {
    rewrite ^(.*)$ http://cdn.example.com$1 permanent;
}
Replace http://cdn.example.com with the URL of your CDN and adjust the file types in the location block pattern as needed.
Restart or reload Nginx to apply the changes:
sudo systemctl restart nginx
service nginx restart
You are Done