DEBUG LOG:
In WordPress, WP_DEBUG is a constant that, when set to true, enables debugging mode. When debugging mode is enabled, WordPress will display PHP errors, notices, and warnings on the screen. This can be very helpful
for developers to identify and troubleshoot issues with their code or configuration.
Why Use DEBUG LOG:
- Error Tracking: The debug log captures PHP errors, notices, and warnings that occur on your WordPress site. By logging these messages, you can track down issues more easily, even if they occur infrequently or in parts of your site that aren’t immediately visible.
- Continuous Monitoring: With the debug log enabled, you have a continuous record of PHP errors that occur on your site. This can be helpful for ongoing maintenance and monitoring, allowing you to proactively address issues as they arise.
- Debugging Development: During the development phase of a WordPress site or plugin, having a debug log helps developers identify and fix bugs more efficiently. The log provides detailed information about errors and warnings, aiding in the debugging process.
How to enable WP_DEBUG:
Method-1 (With plugin):
WordPress Debugging plugins are tools designed to assist developers in identifying and resolving issues within WordPress websites and plugins.
In a typical WordPress installation, the debug log file (debug.log) is located within the wp-content directory. Here’s how you can locate it:
- Using FTP or SFTP: If you’re using FTP (File Transfer Protocol) or SFTP (SSH File Transfer Protocol) to access your WordPress files, follow these steps:
- Connect to your server using your preferred FTP or SFTP client.
- Navigate to the
wp-content directory.
- Look for a file named
debug.log. If it doesn’t exist, it might be because there are no recent debugging messages or because debugging hasn’t been enabled.
- Using File Manager in Hosting Control Panel: If your hosting provider offers a control panel with a file manager, you can use it to locate the debug log:
- Log in to your hosting control panel.
- Navigate to the file manager or file management section.
- Locate the
wp-content directory.
- Look for a file named
debug.log.
- Using SSH (Secure Shell): If you have SSH access to your server, you can use a terminal or SSH client to navigate to the debug log file:
- Connect to your server via SSH.
- Use the
cd command to change directory to the wp-content directory.
- List the files in the directory using the
ls command.
- Look for a file named
debug.log.
Method-2 (without plugin)
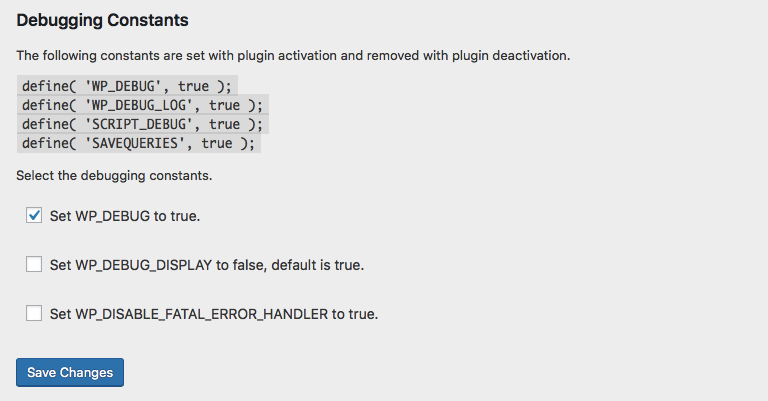
Enable Debugging: Ensure that debugging is enabled in your WordPress installation. This involves setting the WP_DEBUG constant to true in your wp-config.php file. Additionally, you may want to set WP_DEBUG_LOG to true to log debugging messages to a file.
Open your wp-config.php file located in the root directory of your WordPress installation. Look for the following lines:If these lines don’t exist, add them to enable debugging and log messages to a file. Save the changes to the wp-config.php file.
define( 'WP_DEBUG', true );
define( 'WP_DEBUG_DISPLAY', false );
define( 'WP_DEBUG_LOG', true );
Hey There. I found your weblog the usage of msn. This is an extremely smartly written article. I will be sure to bookmark it and come back to read more of your useful information. Thank you for the post. I will definitely return.
Thanks for another wonderful post. Where else could anybody get that kind of information in such an ideal way of writing? I’ve a presentation next week, and I am on the look for such info.